Adding a Downspout to Existing Gutter Systems Without the Stress
When Water Has Nowhere to Go: Why Homeowners Add a Downspout to Their Gutter Systems
If you need to add a downspout to your gutter system, here’s the quick answer:
How to Add a Downspout to an Existing Gutter (Overview)
- Choose the location — place every 30–40 feet of gutter run, at the lowest point
- Cut the outlet hole — use tin snips to cut an opening in the gutter bottom
- Install a drop outlet — seal and rivet it into the hole (never bend and fold the gutter material)
- Attach elbows — create an offset from the gutter to the wall using two elbows
- Install downspout sections — work top to bottom, overlapping each section
- Secure with brackets — one every 6–8 feet along the wall
- Add a bottom extension — direct water at least 4–6 feet from your foundation
A few inches of rain falling on a typical roof can send thousands of gallons of water rushing toward your home’s foundation. Without enough downspouts to handle that load, gutters overflow, water pools against your home, and the damage that follows — cracked foundations, basement flooding, soil erosion — can cost anywhere from $2,000 to $15,000 to repair.
The problem is often simpler than homeowners expect. In many cases, an existing gutter system just doesn’t have enough downspouts to move water away fast enough. Adding one in the right place can make an immediate difference.
I’m Rich Mannino, General Manager of K-Guard Leaf Free Gutters, and after nearly two decades helping homeowners solve drainage problems — including knowing exactly when and where to add a downspout to a gutter system — I’ll walk you through everything you need to know. Let’s start with whether your system actually needs one.

Why You Need to Add Downspout to Gutter Systems
To understand why you might need to add a downspout to your gutter system, we have to look at the sheer volume of water your roof handles. A 1,000-square-foot roof produces approximately 600 gallons of water for every single inch of rainfall. During a heavy Central Ohio storm, that volume is dumped over a very short period. If your gutter system lacks the proper drainage paths, that water will overflow the sides of your gutters, creating a waterfall right next to your home.
This overflow is more than just an eyesore; it is a direct threat to your home’s structural integrity. Here is what happens when roof runoff is not managed properly:
- Foundation Damage: Water pooling around your home’s perimeter saturates the soil. In Central Ohio, our soil contains a high concentration of clay. Clay soil acts like a sponge, expanding dramatically when wet and shrinking when dry. This constant expansion and contraction puts immense hydrostatic pressure on your foundation walls, leading to cracks, bowing, and structural shifting.
- Basement Flooding: Once foundation cracks form, water will find the path of least resistance. It pools against basement walls and seeps through basement windows, crawlspaces, or cracks in the concrete slab, leading to mold growth and expensive cleanup bills.
- Soil Erosion and Landscaping Ruin: Heavy cascades of water falling from overflowing gutters will wash away mulch, ruin expensive landscaping, and erode the soil slope that is supposed to naturally grade water away from your home.
Installing an additional downspout acts as a safety valve. By creating another exit point for the rainwater, you relieve the pressure on the gutter trough, prevent overflow, and distribute the water load more evenly around your property. For a deeper look into how these components work together, check out The Complete Guide to Gutter Downspouts.
Assessing Drainage Needs and Sizing Calculations
Before you purchase materials to add a downspout to your gutter, you need to analyze your existing setup. You cannot simply place a downspout anywhere and expect it to work; its placement must match the physical laws of gravity, roof size, and local rainfall patterns.

A common rule of thumb is to install one downspout for every 30 to 40 feet of gutter run. However, this general guideline can be misleading if you do not account for the size of the downspout itself or the pitch of your roof.
To help visualize the difference, look at how downspout dimensions impact their overall capacity:
| Downspout Size | Cross-Sectional Area | Roof Area Capacity (Standard Pitch) | Flow Capacity (per Minute) |
|---|---|---|---|
| 2×3 Inch (Standard) | 6 square inches | Up to 600 sq. ft. | 3–5 gallons |
| 3×4 Inch (Oversized) | 12 square inches | Up to 1,200 sq. ft. | 8–12 gallons |
As you can see, upgrading from a standard 2×3-inch downspout to an oversized 3×4-inch downspout doubles your cross-sectional capacity. If you have a long gutter run of 40 feet or more, a single 2×3-inch downspout is highly likely to back up during a heavy downpour, whereas a 3×4-inch downspout can handle the volume with ease. For more detailed insights into how placement protects your home, see this guide on Protecting Your Home: Understanding Placement of Downspouts.
Sizing Calculations to Add Downspout to Gutter Runs
To calculate exactly how many downspouts you need, follow this simple formula:
- Calculate the Roof Area: Measure the length and width of the specific roof section that drains into the gutter run you are evaluating. Multiply these numbers to get the square footage. (e.g., a roof section that is 40 feet long and 15 feet wide has an area of 600 square feet).
- Determine Your Downspout Capacity: Standard residential downspouts require 1 square inch of downspout cross-section for every 100 square feet of roof area.
- A 600 sq. ft. roof section requires 6 square inches of downspout cross-section. A 2×3-inch downspout (which has exactly 6 square inches of area) is right at its maximum limit here.
- If your roof pitch is steep (greater than a 5/12 pitch), water will rush into the gutter much faster. In these cases, or in areas prone to heavy storms, we recommend reducing the maximum roof area capacity by 25% to prevent overflow.
Signs Your Existing System is Failing
How do you know if your current downspouts are failing or if your gutters are simply overwhelmed? Watch for these warning signs:
- Water Spilling Over the Sides: If water cascades over the front edge of your gutters during moderate rain, but the gutters are completely clear of leaves, your downspouts are undersized or spaced too far apart.
- Sagging Gutters: A 5-inch gutter holds about 1.2 gallons of water per foot, while a 6-inch gutter holds 2 gallons per foot. Water weighs about 8.3 pounds per gallon. If water cannot drain quickly through the downspouts, the sheer weight of the standing water will cause the gutter to sag, pulling the hangers loose from your fascia board.
- Peeling Paint and Rust Spots: Water backing up in the gutter will seep behind the fascia board, causing paint on your siding to peel and leaving rust stains on metal gutters.
If you notice these issues, it is time to take action. To learn more about assessing your gutter health before starting a project, read our article on how to Install and Replace Rain Gutters Like a Pro: The Ultimate Homeowners Guide.
Tools, Materials, and Step-by-Step Installation
Before you begin, you must gather the correct tools and materials. Using the wrong fasteners or cutting methods can ruin your gutter and cause leaks that are incredibly difficult to seal later.
Here is what you will need for a professional-grade installation:
- Tools:
- Sturdy extension ladder (with ladder stabilizers)
- Cordless drill and 1/8-inch drill bit
- High-quality tin snips (aviation snips)
- Downspout crimper (optional, but highly recommended)
- Hacksaw or miter saw (with a metal-cutting blade)
- Tape measure and marker
- Metal file
- Pop rivet gun or nut driver for sheet metal screws
- Materials:
- Matching downspout sections (aluminum is highly recommended over vinyl)
- Gutter drop outlet (collar)
- Two upper elbows (to navigate the roof overhang/soffit)
- One lower elbow (for the bottom discharge)
- Downspout brackets/straps (at least two per downspout)
- High-grade exterior waterproof silicone sealant
- Stainless steel sheet metal screws or aluminum pop rivets (do not mix metals, as this causes galvanic corrosion!)
For a complete overview of the tools required for larger gutter projects, refer to our DIY Guide to Installing Rain Gutters on a House.
Step-by-Step Guide to Add Downspout to Gutter Systems
Ready to begin? Follow these steps carefully to ensure a leak-free, professional installation. For an alternative visual walkthrough, you can also read How to Install Downspouts in 5 Simple Steps or consult this guide on Gutter Downpipe Installation: 5 Easy Steps.
Step 1: Plan and Mark the Downspout Location
Locate the lowest point of your gutter run. This is where the water naturally pools. Verify that the ground directly below this point slopes away from your home’s foundation. Mark the center of the new downspout location on the bottom of the gutter using a marker.
Step 2: Cut the Outlet Hole
Place your drop outlet flange-side down over your mark on the bottom of the gutter and trace its inner opening. Drill a starter hole inside your traced shape.
Using your tin snips, carefully cut out the traced hole.
Pro Tip: Never use the “hack” method of cutting a simple “X” in the gutter and bending the flaps downward to screw directly into the downspout. This creates a massive catching point for leaves and debris, leading to immediate clogs. Always cut a clean hole and use a manufactured drop outlet. Smooth any rough metal edges with a metal file.
Step 3: Install the Drop Outlet
Apply a generous bead of high-grade waterproof silicone sealant around the flange of the drop outlet. Insert the outlet into the cut hole from the inside of the gutter, pressing down firmly to create a watertight seal. Secure the outlet to the gutter floor using aluminum pop rivets or short stainless steel sheet metal screws from the underside.
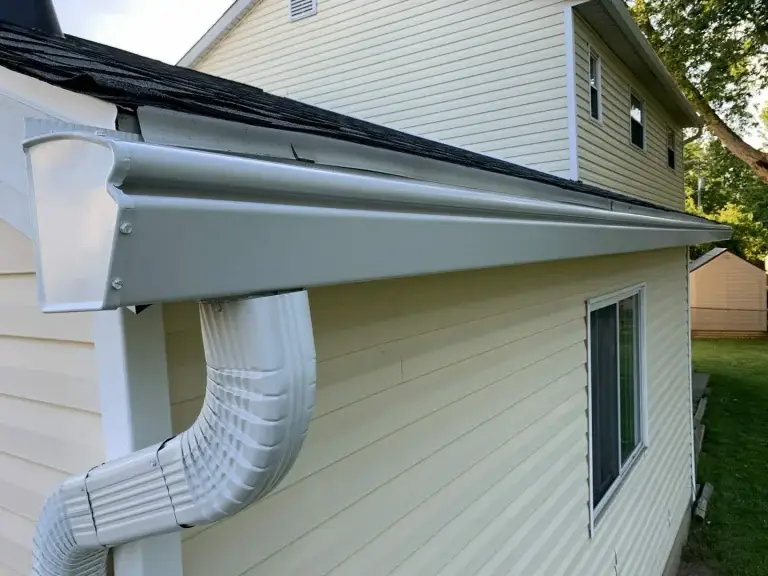
Step 4: Create the Wall Offset (Swan Neck)
Most roofs have an overhang (soffit). To bring the downspout from the gutter outlet back to the exterior wall, you must create an offset using two elbows.
Attach the first elbow directly to the drop outlet. Measure the distance from the exit of this elbow to the wall, cut a short piece of downspout to bridge the gap, and connect it to the second elbow facing downward against the wall. Secure all joints with sheet metal screws.
Step 5: Assemble and Install Downspout Sections
Assemble your downspout sections from top to bottom.
The Golden Rule of Downspouts: The crimped (narrower) end of every downspout section and elbow must always point downward, fitting inside the section below it. If you install a section upside down, water will run down the inside walls, seep through the seams, and cause constant leaks.
Slide the top of your first long downspout section over the wall elbow. If you need to join multiple sections, slide the upper section into the lower section, overlapping them by at least 1.5 inches. Secure the seams with sheet metal screws on the sides (never on the front or back, where they are highly visible).
Step 6: Secure the Downspout with Brackets
Mount your downspout brackets (straps) to the siding. Place the first bracket 12 inches below the top elbow, the second bracket 12 inches above the ground, and space any additional brackets every 6 to 8 feet in between.
For wood or fiber cement siding, pre-drill 1/8-inch pilot holes and secure the brackets into studs using 2-inch exterior screws. For brick or masonry, use wall anchors.
Step 7: Install the Discharge Elbow and Extension
Attach your final elbow at the bottom of the downspout, pointing away from your home’s foundation. Slide a downspout extension onto this elbow to carry the water safely away. For detailed guidance on installing drop outlets and downspout components, see this expert guide on How to Install Downspout – Benefits, Installation & Expert Guide.
Best Practices for Directing Water Away from the Foundation
Getting the water out of your gutter is only half the battle. If you let the downspout discharge right at the corner of your home, you have accomplished nothing; the water will simply soak straight down into your foundation.
To protect your home, follow these discharge best practices:
- The 5-Foot Rule: At a bare minimum, downspout extensions must discharge water at least 5 feet away from your foundation. If your yard has clay-heavy soil (which is incredibly common in Central Ohio), extend this distance to 10 feet.
- Use Splash Blocks: If you are discharging water onto your lawn or garden bed, place a concrete or plastic splash block at the end of the extension to dissipate the water’s energy and prevent soil erosion.
- Go Underground: Above-ground extensions can be unsightly and present a major tripping hazard when mowing the lawn. Burying your downspout extensions is the gold standard for drainage. Dig a trench with a consistent downward slope of at least 1 inch for every 10 feet, lay solid PVC pipe (avoid cheap corrugated pipe, which catches debris and collapses easily), and run it to a bubbler pot, drywell, or daylight exit point at least 10 feet from your home.
If you are dealing with persistent yard drainage issues or want to learn how to trench your lines properly, check out our guide on The Complete Guide to Buried Downspout Extensions and Drains. For professional plumbing or underground drain repair in Delaware, OH, you can also consult Downspout Drain Repair | Delaware, OH – Amanda Plumbing.
Cost Analysis, Maintenance, and Common Mistakes
When deciding whether to add a downspout to your gutter as a DIY project or to hire a professional, it helps to look at the numbers.
- DIY Installation: If you choose to do the work yourself, materials (downspouts, elbows, brackets, sealant, and screws) will cost between $85 and $175 per downspout. While this saves you money on labor, it requires a significant time investment (typically 6 to 8 hours for a beginner) and carries the risk of falling from a ladder or permanently damaging your existing gutters.
- Professional Installation: Having a gutter specialist install a single downspout typically costs between $150 and $350. For a complete, professionally installed gutter and downspout system on an average-sized home, the cost is approximately $5,000.
While DIY is tempting, professional installation ensures that the gutters are sloped correctly, the downspouts are sized perfectly for Central Ohio’s heavy rainstorms, and the work is backed by a warranty.
Common Installation Mistakes to Avoid
If you do decide to tackle this project yourself, make sure to avoid these costly errors:
- Galvanic Corrosion (Mixing Metals): Never use steel screws on aluminum gutters or downspouts. When different metals touch and are exposed to water, an electrochemical reaction occurs that will eat holes through your aluminum within 2 to 3 years. Always use matching aluminum rivets or stainless steel screws.
- Backward Crimping: As mentioned before, always ensure the upper pipe slides into the lower pipe. Installing them backward is the number one cause of persistent wall leaks.
- Ignoring Gutter Slope: Before cutting a hole for your new downspout, make sure the gutter actually slopes toward that location. Gutters must slope at least 1/4 inch for every 10 feet of run toward the downspout. If the gutter slopes away from your new downspout, water will pool at the opposite end, rendering your new downspout useless.
- Inadequate Bracket Spacing: Spacing brackets more than 8 feet apart leaves your downspouts vulnerable to high winds. During heavy storms, a loose downspout can tear completely away from your home, causing significant damage.
To ensure your system is installed correctly the first time, you can find professional services in your area through Columbus OH Gutter Guard Installation Done Right the 1st Time.
Frequently Asked Questions About Downspout Installation
How far should a downspout extend from the house?
At a bare minimum, a downspout should extend 4 to 6 feet away from your home’s foundation. However, if your home is built on clay soil or has poor grading, we highly recommend extending the discharge line 8 to 10 feet away to prevent water from migrating back toward your basement walls.
Can I connect a new downspout to an existing underground drain?
Yes, but you must take proper precautions. First, flush the existing underground line with a garden hose to verify that it is completely clear of roots, dirt, or debris.
Second, never connect your downspout directly to your home’s perforated foundation footing drains, as this can back up and flood your basement. Always connect to a dedicated, solid storm-water line. For legal and safety guidelines regarding disconnecting and redirecting downspouts, review the Downspout Disconnection Instructions.
Is vinyl or aluminum better for downspouts?
Aluminum is far superior to vinyl, especially for homes in Central Ohio. Aluminum handles extreme temperature shifts without cracking, resists UV degradation, and has a lifespan of 20 to 30 years. Vinyl downspouts are cheaper and easier to install, but they quickly become brittle in cold winter weather, crack under ice pressure, and typically last only 10 to 15 years.
Conclusion
Adding a downspout to your existing gutter system is an excellent way to protect your home’s foundation, prevent basement flooding, and keep your yard looking beautiful. However, traditional gutter systems — even those with extra downspouts — still suffer from one fatal flaw: they clog.
When leaves, pine needles, and maple seeds fill your gutter trough, it doesn’t matter how many downspouts you have; water will still overflow.
If you are tired of climbing ladders to clean out your gutters, or if you want a permanent solution to your home’s drainage worries, it is time to upgrade to the K-Guard Leaf Free Gutter System.
Unlike traditional add-on covers, K-Guard is a fully integrated, seamless gutter system engineered to handle virtually unlimited rainfall. It features oversized 3×4-inch downspouts as a standard, a lifetime guarantee, and a design that guarantees the elimination of annual gutter cleaning.
With a $5,000 average installation cost, K-Guard is an investment that protects your home’s foundation for a lifetime.
Ready to eliminate gutter stress forever? Contact us today to schedule your free estimate and explore our K-Guard professional installation services.