The Ultimate Guide to Installing and Fastening Gutter Extensions
Understanding Downspout Extensions and System Types
When rainwater pours off your roof during Central Ohio’s heavy spring and summer storms, your gutters collect that volume and channel it down to the ground. However, if the water simply discharges at the base of the wall, serious structural problems begin to brew. Over time, localized water pooling saturates the backfill around your home, putting extreme hydrostatic pressure against basement walls, eroding surface soil, and causing concrete slabs to crack or settle.
To protect your home, you must maintain an adequate water clearance distance. Rainwater should always be directed away from foundation walls to keep your basement dry and your landscape intact. For a deep dive into sizing and downspout capacity, read The Complete Guide to Gutter Downspouts.
Flexible, Rigid, and Splash Block Options
Selecting the right extender depends on your budget, yard layout, and aesthetic preferences:
- Flexible Vinyl Extenders: These corrugated plastic pipes (such as the Amerimax Flex-A-Spout) expand between 21 and 55 inches and bend easily around bushes, rocks, or garden structures. Typically priced around $8.98 to $20, flexible vinyl extenders offer a quick, budget-friendly fix.
- Rigid Metal or Plastic Extensions: Made of aluminum or thick vinyl, these match your existing downspouts closely in color and material. They hold up remarkably well against weathering, lawn mowers, and impact.
- Flip-Up / Hinged Extensions: Rigid extenders equipped with a mechanical hinge allow you to flip the pipe upward when mowing the lawn or clearing footpaths, eliminating tripping hazards.
- Splash Blocks: Heavy plastic or concrete troughs positioned beneath the downspout outlet sloped outward. While splash blocks slow soil erosion right at the base, they only move water 2 to 3 feet out—meaning they should ideally be paired with a longer extension tube.
Underground Drainage and Pop-Up Systems
If you prefer a clean look with zero visible pipes running across your turf, buried drain lines are the gold standard. In these setups, the downspout connects directly to an underground 4-inch solid PVC or corrugated pipe.
The pipe runs beneath your lawn to a catch basin or a bubbler pop-up emitter. During rain, water pressure pushes the pop-up lid open to release water safely onto the grass, then retracts flat when dry so you can drive your lawnmower directly over it. For a comprehensive overview of buried setups, check out Downspout Drain Extensions 101: Keep Your Foundation High and Dry.
How to Attach Downspout Extension Systems Correctly
Before you buy materials or grab a drill, you need to identify your downspout dimensions. Most residential homes feature standard rectangular downspouts sized at either 2×3 inches or 3×4 inches. Measuring the bottom drop opening ensures you buy compatible elbows and adapters.
To ensure your extension stays attached during intense downpours, you can rely on mechanical fasteners like sheet metal screws, tool-free compression collars, or dedicated transition boots. Friction-fit installations without secure fasteners often wash loose under pressure. Learn more about properly fitting components in The Ultimate Guide to Gutter to Downspout Connection and Fittings.
Tools and Materials Needed for Installation
To attach downspout extension pipes properly above ground, gather the following basic tools and supplies:
- Tape measure and marker
- Hacksaw or tin snips
- Needle-nose pliers (for crimping aluminum edges)
- Cordless drill with a 1/4-inch hex driver bit
- 1/2-inch stainless steel self-tapping sheet metal screws
- Downspout elbow fitting (A or B style fitting matching your drop angle)
- Flexible or rigid downspout extension tubing
- Gravel, pavers, or splash block for the discharge zone
Step-by-Step: How to Attach Downspout Extension Tubing
- Measure and Mark the Cut Height: For surface extensions up to 6 feet long, measure roughly 12 inches up from the ground on your downspout pipe and mark it with a pencil.
- Cut the Downspout: Using a hacksaw or tin snips, make a straight horizontal cut through the aluminum downspout at your mark. Wear gloves to protect against sharp metal edges.
- Crimp the Cut End: Use needle-nose pliers to make small crimps along the interior edges of the cut downspout end. This reduces the circumference slightly so the elbow slides on cleanly.
- Attach the Elbow Fitting: Slide the female upper opening of the elbow fitting over the crimped downspout end. Ensure the upper pipe overlaps inside the lower fitting to prevent leaks.
- Fasten with Screws: Drive two self-tapping sheet metal screws into the sides of the elbow joint to lock it firmly in place.
- Attach Extension Tubing: Slide your corrugated flexible pipe or rigid extension over the outlet of the elbow. If using multi-fit products like the Amerimax Vinyl Downspout Extension from Lowe’s or the Amerimax Flex-A-Spout from Home Depot, push the adapter sleeve firmly over the elbow until it locks.
- Secure the Joint: Insert one or two self-tapping screws on the top or sides of the adapter.
- Position and Stake: Extend the tubing out from your home, maintaining a distinct downhill slope, and secure the discharge end over gravel or stone.
For a helpful visual walkthrough of this process, watch this guide on How To Install Downspout Extensions Video.
Can You Attach Downspout Extension Kits Without Tools?
Yes, homeowners who prefer not to use power tools or sheet metal screws can choose specialized tool-free extension systems. Options like the VEVOR Flexible Downspout Extender 2-Pack ( priced around $21.59 per box) feature flexible snap-fit collars and built-in debris filter screens that attach directly onto standard metal outlets without drilling.
Additionally, advanced designs detailed in the Downspout Extension System Patent Specification use sliding ratchet collars and interlocking mechanical clamps. These systems fit around standard 2×3, 3×4, or round downspouts, creating high mechanical tension that holds firm under water pressure without requiring screws or glue.
How to Install Buried Underground Downspout Extensions
When surface pipes look cluttered or create lawn maintenance hassles, installing an underground drainage system offers a seamless solution.
| Feature / Metric | Flexible Surface Extensions | Buried PVC Underground Lines |
|---|---|---|
| Average Initial Cost | $10 – $30 per downspout | $150 – $400 DIY / Included in custom installs |
| Lawn Mower Friendly? | No (must be moved or flipped up) | Yes (pop-up emitter sits flush in turf) |
| Installation Effort | Low (15 – 30 minutes) | Moderate to High (trenching & pipe assembly) |
| Lifespan & Durability | 3 – 7 years (UV degradable) | 25+ years (Schedule 40 / Smooth PVC) |
| Clog Risk | Moderate (debris visible) | High if leaves enter pipe (requires gutter guards) |
| Discharge Reach | Typically 3 to 6 feet | 8 to 20+ feet from foundation |
To understand full underground configurations, refer to The Complete Guide to Buried Downspout Extensions and Drains.
Measuring Length, Pitch, and Foundation Clearance
When laying underground extensions, proper slope and clearance are crucial:
- Discharge Distance: Water should discharge at least 5 to 10 feet away from your foundation (8 to 10 feet is recommended in clay-heavy Central Ohio soil).
- Minimum Slope Grade: You must maintain a downhill grade of at least 1% to 2% slope grade (which equates to roughly 1 to 2 inches of drop for every 8 to 10 feet of pipe run). Without adequate slope, water pools inside buried lines, causing sediment buildup and winter freeze bursts.
Trenching and Connecting Underground PVC Drain Pipes
- Call 811 Before Digging: Always dial 811 to have public utility lines marked before starting any trench work in your yard.
- Dig the Trench: Mark your route using outdoor spray paint. Dig a trench about 6 inches wide and start at a minimum depth of 8 to 12 inches near the foundation, sloping downward toward the outlet point.
- Place the Downspout Adapter & Cleanout: Attach a downspout-to-PVC adapter boot directly below your downspout. We recommend installing an open air gap or cleanout tee near ground level. This serves as an overflow point if ground lines freeze in deep winter.
- Lay smooth-wall PVC Pipe: Place 4-inch solid PVC pipe inside the trench. Avoid perforated pipe near the foundation, as perforated walls dump water straight into the surrounding backfill.
- Attach the Bubbler Pop-Up Emitter: Connect a pop-up bubbler assembly or catch basin at the discharge end. Ensure the emitter pot sits over a bed of crushed river gravel to allow residual water to drain out after rain stops.
- Test and Backfill: Run a hose through the system to test the flow rate. Once verified, backfill the trench with soil, tamp down lightly, and restore your grass sod.
For top kit reviews and lawn care strategies, see Don’t Let Your Gutters Down: Top Buried Downspout Kits to Save Your Lawn.
Maintenance Tips and Common Installation Mistakes to Avoid
Installing extensions is only half the battle—keeping water flowing freely year-round requires avoiding a few common traps.
Preventing Clogs and Managing Winter Freeze-Thaw
In regions like Central Ohio, winter freeze-thaw cycles present real challenges for downspouts. Water left standing in flat extensions freezes solid, creating heavy ice dams that split plastic tubing or back up into gutters.
To protect your system:
- Clear surface extensions of leaves, soil, and organic sludge every autumn.
- Disconnect flexible corrugated extenders before severe winter freezes if they do not drain completely.
- For underground pipes, ensure an air-gap ice break feature or cleanout tee is installed right under the downspout drop. This allows overflow water to escape safely on top of the lawn if the buried line freezes.
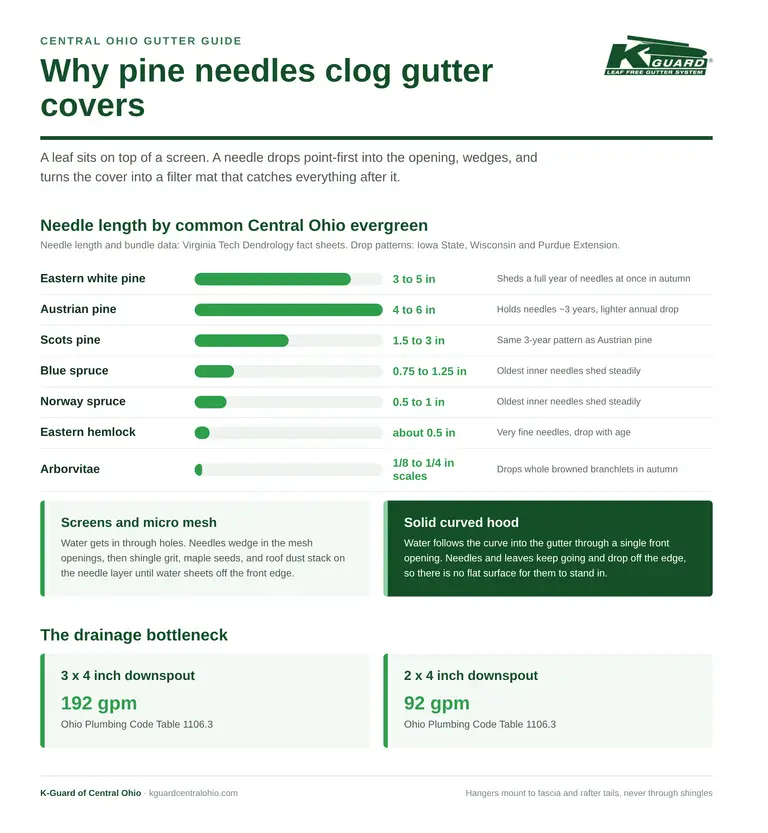
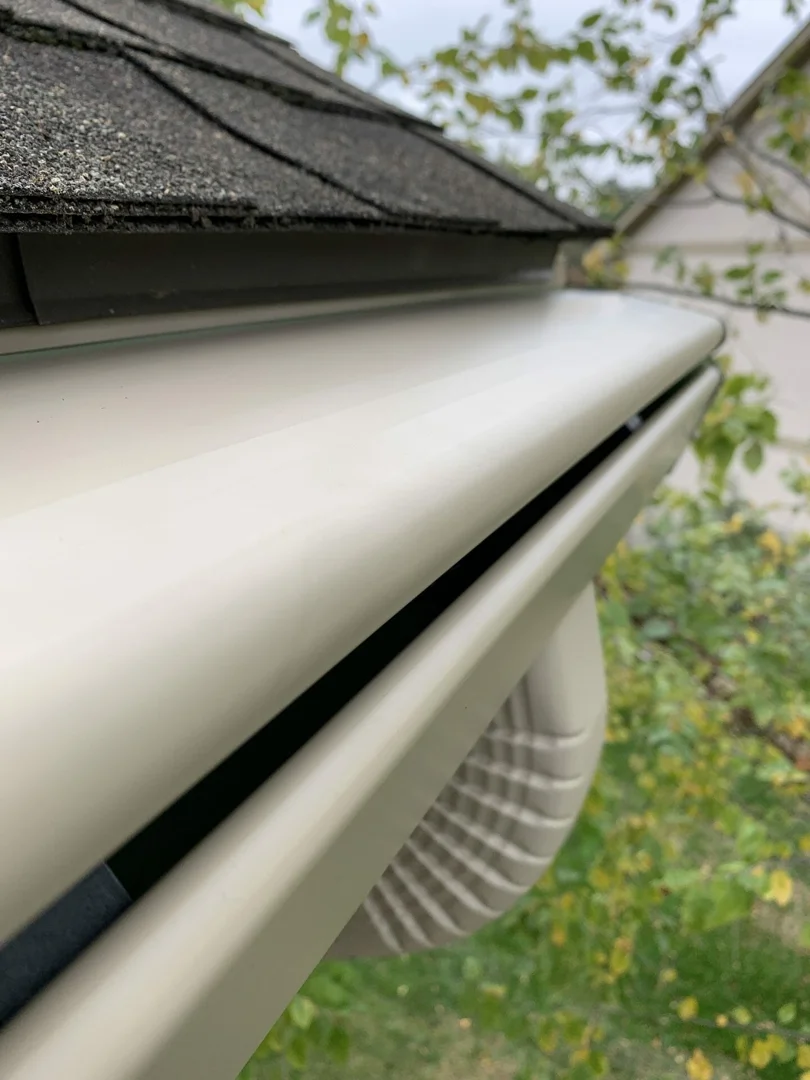
- The Ultimate Solution: Pair your downspout extensions with a high-capacity gutter guard system. Our K-Guard leaf-free gutter system fully covers the top gutter trough, keeping leaves, twigs, and pine needles out completely. When debris can’t enter your gutters, it can’t enter your extensions or clog buried drainage lines.
Fastening Errors That Trap Debris and Dam Water
When homeowners attach downspout extension adapters, they often make these avoidable mistakes:
- Driving Long Screws Directly Through the Center: Using long sheet metal screws straight into downspout flow paths creates sharp internal hooks. Leaves catch on these points, creating hidden blockages inside the pipe. Always place short 1/2-inch screws along the side joints where they won’t snag debris.
- Relying Solely on Friction Fits: Smooth vinyl pushed over aluminum without fasteners eventually slips off under heavy rainwater surge or during winter snow slides.
- Creating U-Shaped Dip Hazards: Allowing flexible accordion tubing to sag on uneven lawn surfaces creates low points where standing water collects and stagnant sludge settles.
- Discharging Water Toward Neighboring Lots: Always ensure water outlets discharge on your own property and slope naturally toward designated swales, rain gardens, or municipal stormwater drains.
Frequently Asked Questions About Gutter Extensions
How far should a downspout extension extend from the foundation?
A downspout extension should direct rainwater at least 5 feet away from your home’s foundation walls. For maximum protection against foundation settling, water seepage, and basement dampness, extending water clearance to 8 to 10 feet is ideal.
What slope is required for proper rainwater drainage?
Gutter extensions require a downhill slope of at least 2% grade, which equals approximately 1/4 inch of vertical drop for every foot of horizontal run (or 2 inches of drop per 8 feet). Maintaining this incline prevents standing water from pooling inside the extension.
Do screws driven into downspouts cause internal clogs?
Yes, if you use long screws or drive them directly into the center of the water channel. Debris and leaves catch on exposed internal screw threads, forming stubborn clogs over time. To avoid this, use short 1/2-inch self-tapping screws driven strictly into outer side seams, or use tool-free mechanical locking collar kits.
Conclusion
Taking the time to attach downspout extension accessories correctly keeps roof runoff moving safely away from your home, preserving your foundation, keeping your basement dry, and preventing expensive lawn erosion. Whether you select a simple flexible vinyl extender, a flip-up adapter, or a buried underground PVC drain system, proper slope, secure mechanical fastenings, and adequate clearance make all the difference.
However, even the best downspout extension can only do its job if water can flow into it cleanly. When traditional open gutters fill up with leaves, seeds, and sludge, downspouts choke up and water spills straight over the sides of your roof—rendering your extensions completely useless.
At K Guard Central Ohio, we provide the permanent solution to roof water management. The K-Guard leaf-free gutter system features a patented hood design that completely blocks leaves and debris while channeling stormwater directly into heavy-duty downspouts. Backed by our lifetime guarantee, our system delivers the total elimination of annual gutter cleaning—so you’ll never have to climb a ladder to clean gutters again!
With an average house installation cost of approximately $5,000, upgrading to K-Guard protects your home from the roofline down to the foundation for a lifetime.
Ready to safeguard your home against stormwater damage for good? Schedule your professional installation with K Guard Central Ohio today!