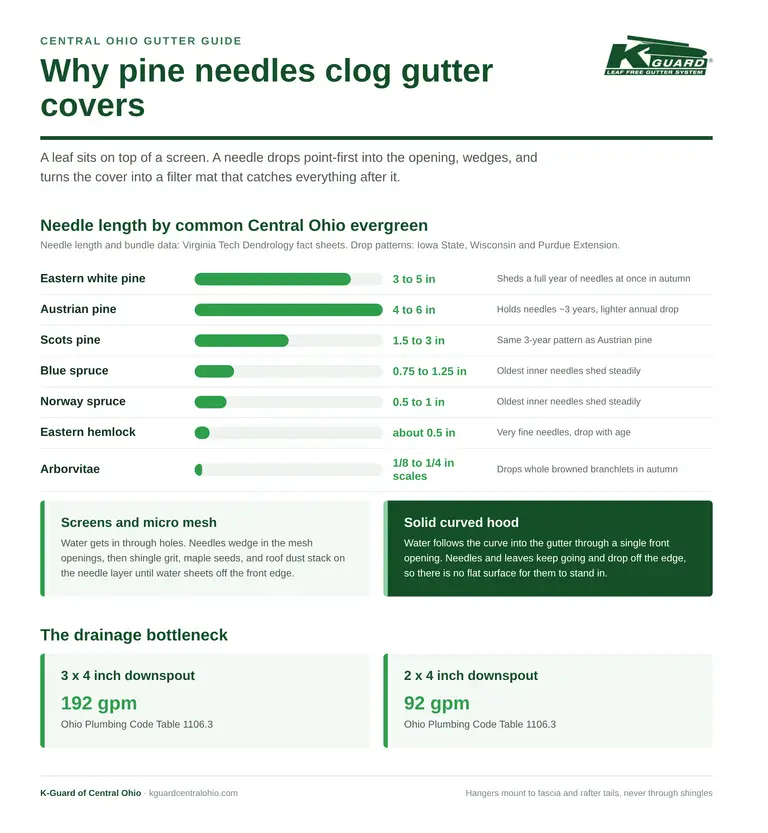
Gutter DIY: How to Add a Downspout to Your Existing System
Why Adding a Downspout Could Save Your Foundation
Knowing how do you install a downspout on an existing gutter could be one of the most valuable home improvement skills you pick up this year. Here’s the short version:
- Mark and cut an outlet hole at the low end of your gutter run
- Attach a drop outlet with sealant and screws or rivets
- Connect elbows to bridge the gutter to the wall
- Assemble downspout sections top to bottom, crimped ends pointing down
- Secure brackets to the wall every 5–6 feet
- Add a bottom elbow and extension directing water at least 4–6 feet from your foundation
A few inches of rain falling on a typical roof can produce thousands of gallons of runoff. Without a working downspout, that water pools right at your foundation — exactly where it causes the most damage. We’re talking foundation cracks, basement flooding, and soil erosion that can cost anywhere from $2,000 to $15,000 to fix. Alternatively, upgrading to a complete, worry-free professional gutter guard system that eliminates annual gutter cleaning with a lifetime guarantee costs an average of $5,000.
The good news? Adding a downspout to an existing gutter system is a beginner-to-intermediate DIY project. Most homeowners finish it in 1–2 hours with materials costing as little as $15–$50 per downspout.
I’m Rich Mannino, General Manager of K-Guard Leaf Free Gutters, and after nearly two decades helping homeowners across Central Ohio solve water management problems, I’ve seen how a properly installed downspout — or a missing one — makes all the difference. In this guide, I’ll walk you through everything you need to know about how do you install a downspout on an existing gutter, from planning and tools to step-by-step installation and drainage best practices.
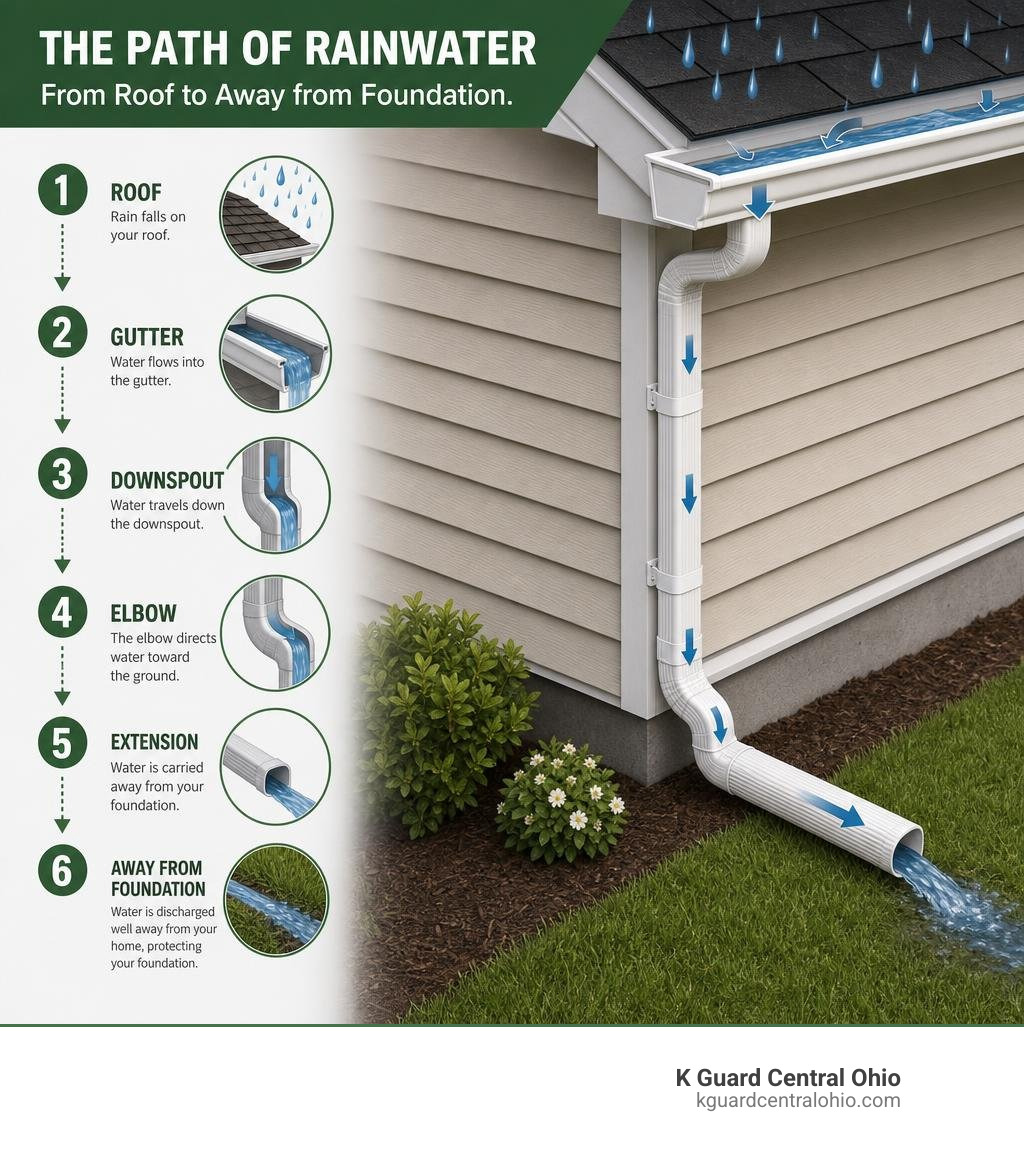
Simple how do you install a downspout on an existing gutter word guide:
- adding a downspout to existing gutter systems without the stress
- how to install downspouts in 5 simple steps
- the ultimate guide to gutter to downspout connection and fittings
Planning Your New Downspout Location and Size
Before you grab your drill and start cutting holes in your metal gutters, you need a plan. Downspouts cannot just be placed anywhere. Their positioning is dictated by the slope of your existing gutters, the layout of your roof, and where you want the water to ultimately drain.
A standard gutter run should slope downward toward the downspout location at a rate of 1/16 to 1/4 inch for every 10 feet of run. If you notice water pooling in a specific section of your gutter during a storm, or if water is cascading over the front edge like a backyard waterfall, it is a clear indicator that your drainage capacity is failing. Adding a strategic downspout at the lowest point of that run is the best way to relieve the system and stop the overflow. To understand how this fits into your current setup, check out our guide on adding a downspout to existing gutter systems without the stress.
Determining If and How Do You Install a Downspout on an Existing Gutter
How do you determine exactly where and how many downspouts your home needs? It comes down to a simple mathematical rule of thumb. For standard residential systems, we recommend installing one downspout for every 20 to 30 linear feet of gutter. If you have a long, uninterrupted gutter run of 60 feet, you will need at least two downspouts—ideally one at each end—with the gutter sloping downward from the center point toward both ends.
You must also consider your roof’s total surface area. A 1,000-square-foot roof section can produce roughly 600 gallons of water for every single inch of rainfall. If you have a steep roof pitch or prominent roof valleys, water will rush into your gutters much faster than it would on a shallow roof. Roof valleys concentrate massive volumes of water into a single spot, so placing a downspout within 10 feet of a major valley is highly recommended to prevent localized overflows. For more detailed rules on spacing, slope, and roof drainage mechanics, refer to the Gutters and Downspouts | Building America Solution Center.
Choosing the Right Downspout Size and Material
When retrofitting a downspout, matching the material and profile of your existing system is critical. If your home has traditional K-style aluminum gutters, you should use matching aluminum downspouts. If you have half-round gutters, you will need round downspouts and a matching round drop outlet.
Standard residential downspouts come in two common rectangular sizes:
- 2×3 inches: Standard for 5-inch gutters, handling up to 600 square feet of roof area.
- 3×4 inches: Standard for 6-inch gutters, handling up to 1,200 square feet of roof area.
If you live in Central Ohio, where heavy spring downpours and sudden summer storms are common, upgrading to a larger 3×4-inch downspout is a smart move. A larger downspout significantly increases your system’s drainage capacity and reduces the likelihood of clogs from falling leaves and pine needles. To explore the differences in shapes and materials, read our breakdown of different types of downspouts round square and everything in between.
Preparation and Required Materials
Once you have chosen your location and sized your materials, it is time to gather your gear. Having everything prepared beforehand will prevent those frustrating mid-project trips to the hardware store.
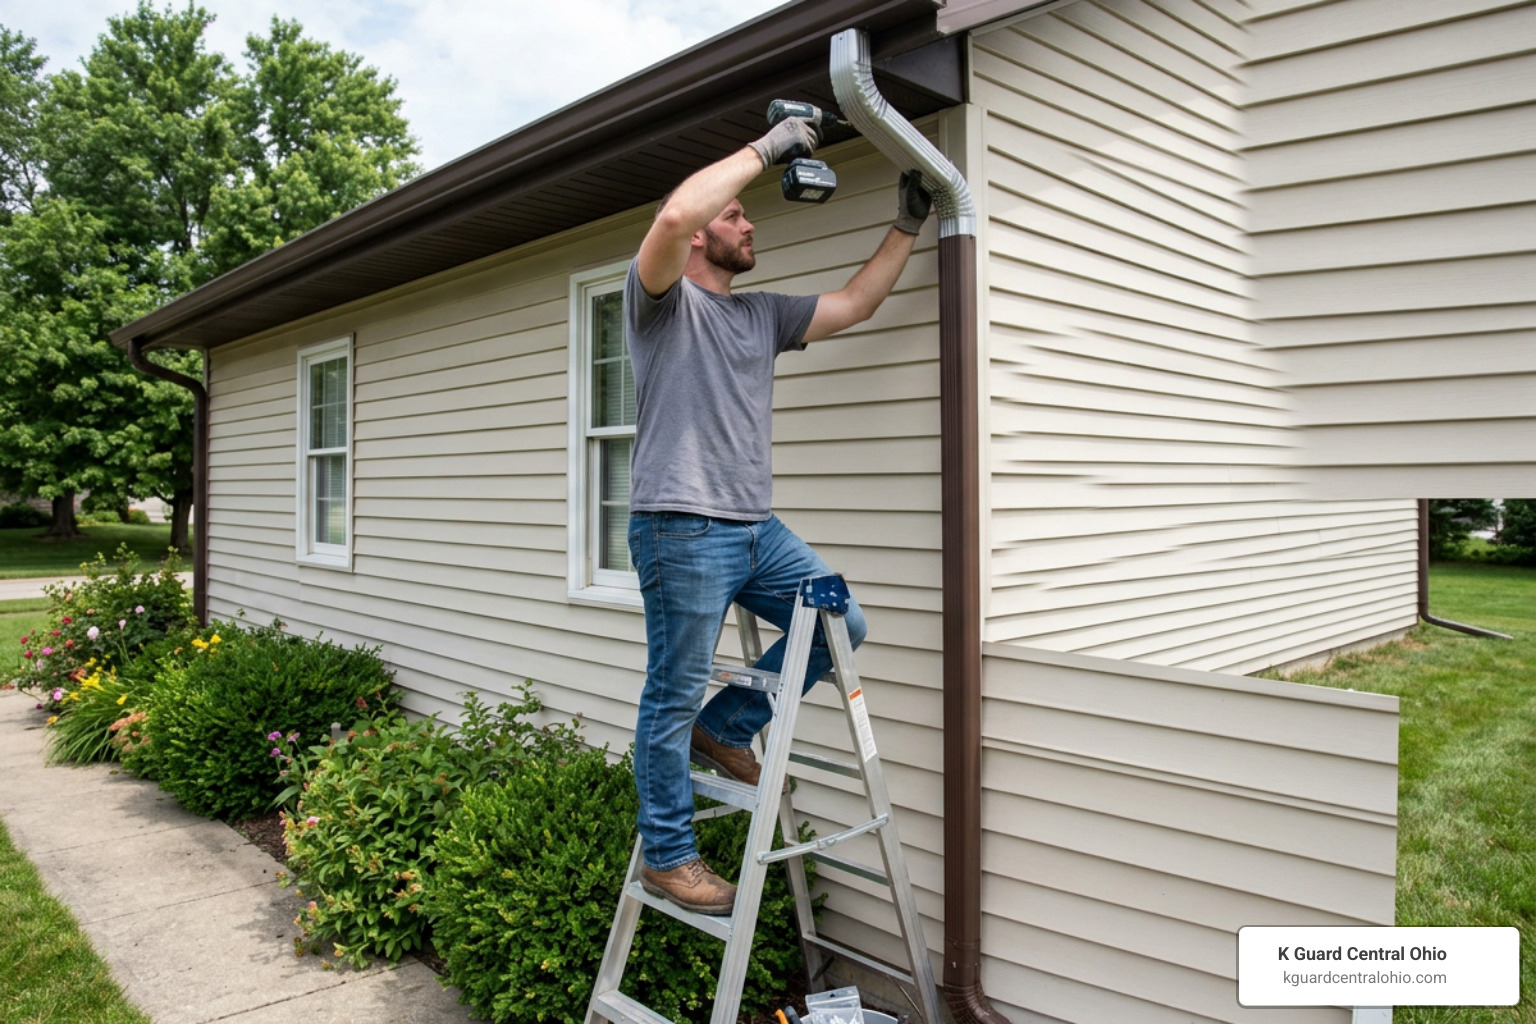
One major rule of thumb to keep in mind when buying materials is to never mix different metals. If you attach copper components to aluminum gutters, or use steel screws on an aluminum system, you will trigger galvanic corrosion. This is an electrochemical reaction that can eat holes through your gutter system within 2 to 3 years. Always match aluminum with aluminum, copper with copper, and use stainless steel or matching painted aluminum fasteners. For a complete look at how these components fit together, read the ultimate guide to gutter to downspout connection and fittings.
Essential Tools Needed When You Install a Downspout on an Existing Gutter
To successfully complete this installation, you will need the following tools:
- Power drill and driver bits
- Spade drill bit (or a 2-inch hole saw) to create a starter hole
- Left-cut and right-cut tin snips (offset snips work best for cutting gutter metal)
- Hacksaw or miter saw with a metal-cutting blade to cut downspout sections
- Rivet gun and pop rivets (or 1/4-inch hex head sheet metal screws)
- High-quality waterproof silicone gutter sealant
- Metal file to smooth down sharp burrs
- Measuring tape and pencil
- A sturdy ladder
Safety Precautions for Working at Heights
We cannot stress safety enough. Working on a ladder requires your full attention. Always place your ladder on flat, stable ground. If you are working on soft soil, place a wide wooden board under the ladder’s feet to keep them from sinking. Use the 4:1 ladder rule: for every 4 feet of height, the base of the ladder should be 1 foot away from the wall.
Always wear safety glasses when drilling or cutting metal, as tiny, sharp metal shards can easily fly into your eyes. Wear heavy-duty work gloves when handling cut downspout sections—freshly cut aluminum edges are as sharp as razor blades and will easily slice through bare skin.
Step-by-Step Guide: How Do You Install a Downspout on an Existing Gutter?
Now, let’s dive into the physical installation. The key to a leak-free downspout is assembling the system from top to bottom and dry-fitting your parts before fastening them permanently. This ensures your pipes run plumb and all joints overlap correctly.
For a quick reference on the general process, you can also review our guide on how to install downspouts in 5 simple steps.
Step 1: Mark and Cut the Gutter Outlet Hole
First, set up your ladder securely at your chosen downspout location.
- Take your drop outlet (the metal sleeve that connects the gutter to the downspout) and hold it against the underside of the gutter where you want the downspout to go.
- Use a pencil to trace the inner opening of the drop outlet onto the bottom of the gutter.
- Climb down, or work carefully from the ladder, to drill a starter hole inside your pencil mark. A spade drill bit or hole saw is perfect for this.
- Insert your tin snips into the starter hole and carefully cut out the metal along your pencil line. It is best to cut about 1/16 of an inch outside the line to ensure the drop outlet slides in easily.
- Use your metal file to smooth out any rough edges or metal burrs around the freshly cut hole.
Step 2: Attach the Drop Outlet and Apply Sealant
Now that you have a clean hole, you need to install the drop outlet to create a watertight transition point.
- Clean any dirt, leaves, or moisture away from the inside of the gutter around the cut hole. Silicone sealant will not adhere to wet or dirty surfaces.
- Apply a generous bead of high-quality waterproof silicone gutter sealant around the top flange of the drop outlet.
- Insert the drop outlet into the hole from the inside of the gutter, pressing down firmly so the sealant oozes slightly around the edges.
- From the underside of the gutter, secure the drop outlet flange to the gutter using at least three or four pop rivets or short sheet metal screws.
- Smooth out the excess silicone sealant inside the gutter with a gloved finger to ensure a completely seamless, watertight barrier over the fasteners.
Step 3: Assemble Elbows and Downspout Sections
With the outlet in place, you need to transition the water flow from the gutter overhang back to the exterior wall of your home. This is done using downspout elbows (usually angled at 45 or 90 degrees).
- Slide your first elbow over the drop outlet. Crucial Rule: The crimped (narrower) end of any gutter component must always point downward. This ensures water flows smoothly from the inside of one section into the inside of the next, preventing leaks.
- Hold a second elbow against the siding of your house, aligning it with the upper elbow. Measure the diagonal distance between the two elbows.
- Cut a short section of downspout pipe to bridge this gap using your hacksaw. Smooth the cut edges with your file.
- Slide the short connector pipe into the upper elbow, and slide the lower elbow onto the bottom of the connector pipe.
- Secure each joint with two sheet metal screws or pop rivets on the sides of the pipes—never put fasteners in the direct path of the water flow at the front or back of the pipe, as this catches debris and causes clogs.
Step 4: Secure the Downspout to the Wall with Brackets
Now you are ready to run the long, vertical sections of your downspout down the side of your home.
- Measure the remaining distance from your lower wall elbow to the ground. Cut your downspout pipe to length. If your home is multi-story, you may need to nest multiple vertical sections together. Ensure the upper section slides into the lower section by at least 1.5 inches.
- Slide the vertical pipe onto the lower wall elbow.
- To hold the downspout securely against your home, install downspout straps (brackets). Place one bracket roughly 12 inches below the top elbow, another bracket every 5 to 6 feet along the vertical run, and a final bracket about 12 inches above the ground.
- Wrap the straps tightly around the downspout and secure them to your siding using appropriate screws. If you are mounting to wood siding, screw directly into the wall studs. If mounting to brick or concrete, pre-drill holes and use masonry wall anchors.
Managing Water Runoff and Foundation Drainage
Your downspout is fully mounted to the wall, but your job isn’t quite finished. Letting water dump directly out of the bottom of the pipe onto the ground right next to your siding defeats the entire purpose of the project.
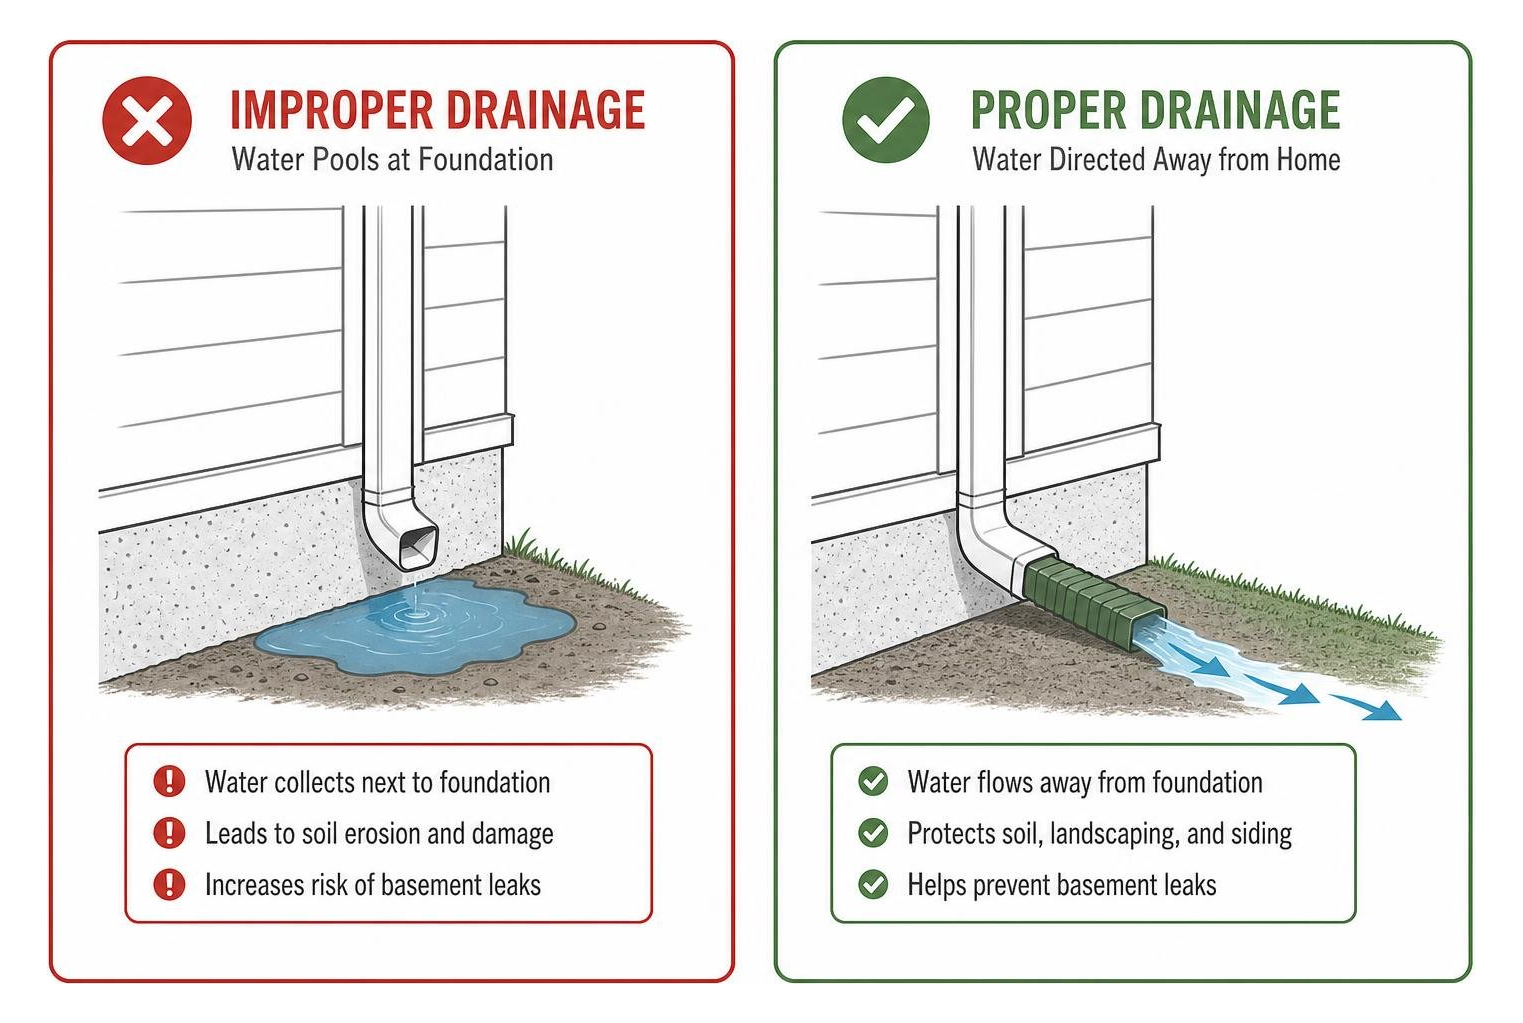
Improper drainage leads to soil erosion, ruined landscaping, and hydrostatic pressure buildup that can crack your basement walls. To learn more about advanced drainage options, take a look at the complete guide to buried downspout extensions and drains.
Proper Extension Distance and Drainage Options
At the bottom of your vertical downspout, attach a final elbow pointing away from your home. From there, you have several excellent options to direct the water safely away:
- Splash Blocks: A simple concrete or plastic tray placed under the elbow to disperse the water.
- Surface Extensions: Flexible or rigid plastic pipes that extend water at least 4 to 6 feet away from your foundation. If you live in an area of Central Ohio with clay-heavy soil (which holds water and swells easily), you should extend this distance to 8 to 10 feet for maximum safety.
- Buried Underground Drains: Connecting your downspout to a solid, non-perforated PVC or ABS pipe that drains underground to daylight or a dedicated storm sewer line. Note: Never connect your downspout directly to your home’s perforated foundation footing drains, as this can overload the system and flood your basement.
Common Installation Mistakes to Avoid
Before you clean up your tools, double-check your work against this list of common DIY pitfalls:
- Crimped Ends Pointing Up: This is the single most common DIY error. If a crimped end points up, water running down the pipe will seep out of the joint and run down the outside of your downspout, causing constant leaks.
- Skipping Gutter Sealant: Simply screwing the drop outlet to the gutter without a heavy bead of silicone sealant will guarantee a dripping leak directly over your foundation.
- Using Too Few Brackets: Downspouts filled with water during a heavy storm get surprisingly heavy. If you don’t secure brackets every 5 to 6 feet, strong winds or heavy water flow can rip the downspout clean off the wall.
- Mixing Metals: Using steel screws on aluminum gutters will cause rapid galvanic corrosion, ruining your hard work within a couple of years.
Frequently Asked Questions about Downspout Installation
To help you decide if this is a project you want to tackle yourself or hand over to a professional, we’ve compiled a quick comparison and answered some of the most common questions we hear from homeowners in Central Ohio. For a deeper dive into downspout styles, care, and sizing, check out the complete guide to gutter downspouts.
| Feature | DIY Downspout Installation | Professional Downspout Installation |
|---|---|---|
| Average Cost | $15 – $50 per downspout (materials only) | $150 – $500 per downspout (labor & materials) |
| Time Required | 1 – 2 hours per downspout | 30 – 45 minutes per downspout |
| Difficulty Level | Beginner to Intermediate | N/A (Expert execution) |
| Risk Factor | High (Ladder work, cutting metal, potential leaks) | Low (Fully insured, professional warranties) |
| Tools Required | Drill, tin snips, hacksaw, rivet gun, ladder | Professional-grade seamless equipment |
How far should a downspout extend from the house?
At an absolute minimum, a downspout should extend 4 to 6 feet away from your home’s foundation. However, if your yard has poor drainage, a flat slope, or clay-heavy soil, we highly recommend extending the discharge distance to 8 to 10 feet using rigid underground PVC pipes or high-quality surface extensions.
Can I install a downspout without a drop outlet?
No. The drop outlet is the essential mechanical connector between the horizontal gutter trough and the vertical downspout pipe. Without a drop outlet, there is no way to create a sealed, structural transition point, and water will inevitably leak behind the gutter, rotting your fascia boards and siding.
How many downspouts do I need on my house?
The general rule of thumb is one downspout for every 20 to 30 linear feet of gutter. However, if you have a steep roof, complex valleys that funnel large volumes of water, or live in an area prone to severe storms, you may need to add additional downspouts to distribute the water load and prevent gutter overflow.
Conclusion
Adding a downspout to an existing gutter system is a highly effective way to improve your home’s drainage and protect your foundation. But let’s be honest: climbing up and down ladders, cutting sharp sheet metal, and sealing leaking joints isn’t everyone’s idea of a fun weekend.
If you are tired of dealing with overflowing gutters, constant cleaning, and worrying about water damage, it might be time to upgrade to a permanent solution. At K Guard Central Ohio, we offer a specialized leaf-free gutter guard system that features oversized gutters and downspouts designed to handle even the heaviest Ohio downpours. Our system comes with a lifetime guarantee against clogging, meaning you will completely eliminate the need for annual gutter cleaning.
While a quick DIY downspout fix is cheap, a complete, worry-free professional gutter guard installation for an average home costs approximately $5,000—an investment that protects your home’s foundation for a lifetime.
Ready to protect your home without the DIY stress? Contact us today at K-Guard Professional Gutter Installation for a free, no-obligation estimate tailored to your Central Ohio home!